TSX-2 Adjustable Toe Arms for Tesla Model S/X (2012- 01/2021)

FREE HATS to all orders above $100! ? Add any hat to your cart. At checkout, enter
coupon code:  HAT4FREE  for a 100% OFF the hat!
Matte Red Anodized
$644.00
Matte Red Anodized
Matte Clear Anodized
$644.00
Matte Clear Anodized
Matte black Anodized (Lifetime Warranty)
$844.00
Matte black Anodized (Lifetime Warranty)
minus
1
plus
? Add any hat to your cart. At checkout, enter
coupon code:  HAT4FREE  for a 100% OFF the hat!
FREE HATS to all orders above $100!
N2ITIVE’s TSX-2 Adjustable Toe Arms were designed to complement our SX-2 Adjustable Camber Arms to allow you to achieve an optimal alignment, available in the Red and Natural Anodized finishes with a 3-Year Warranty or the Black Anodized finish with Lifetime Warranty.

More information about the product

Description

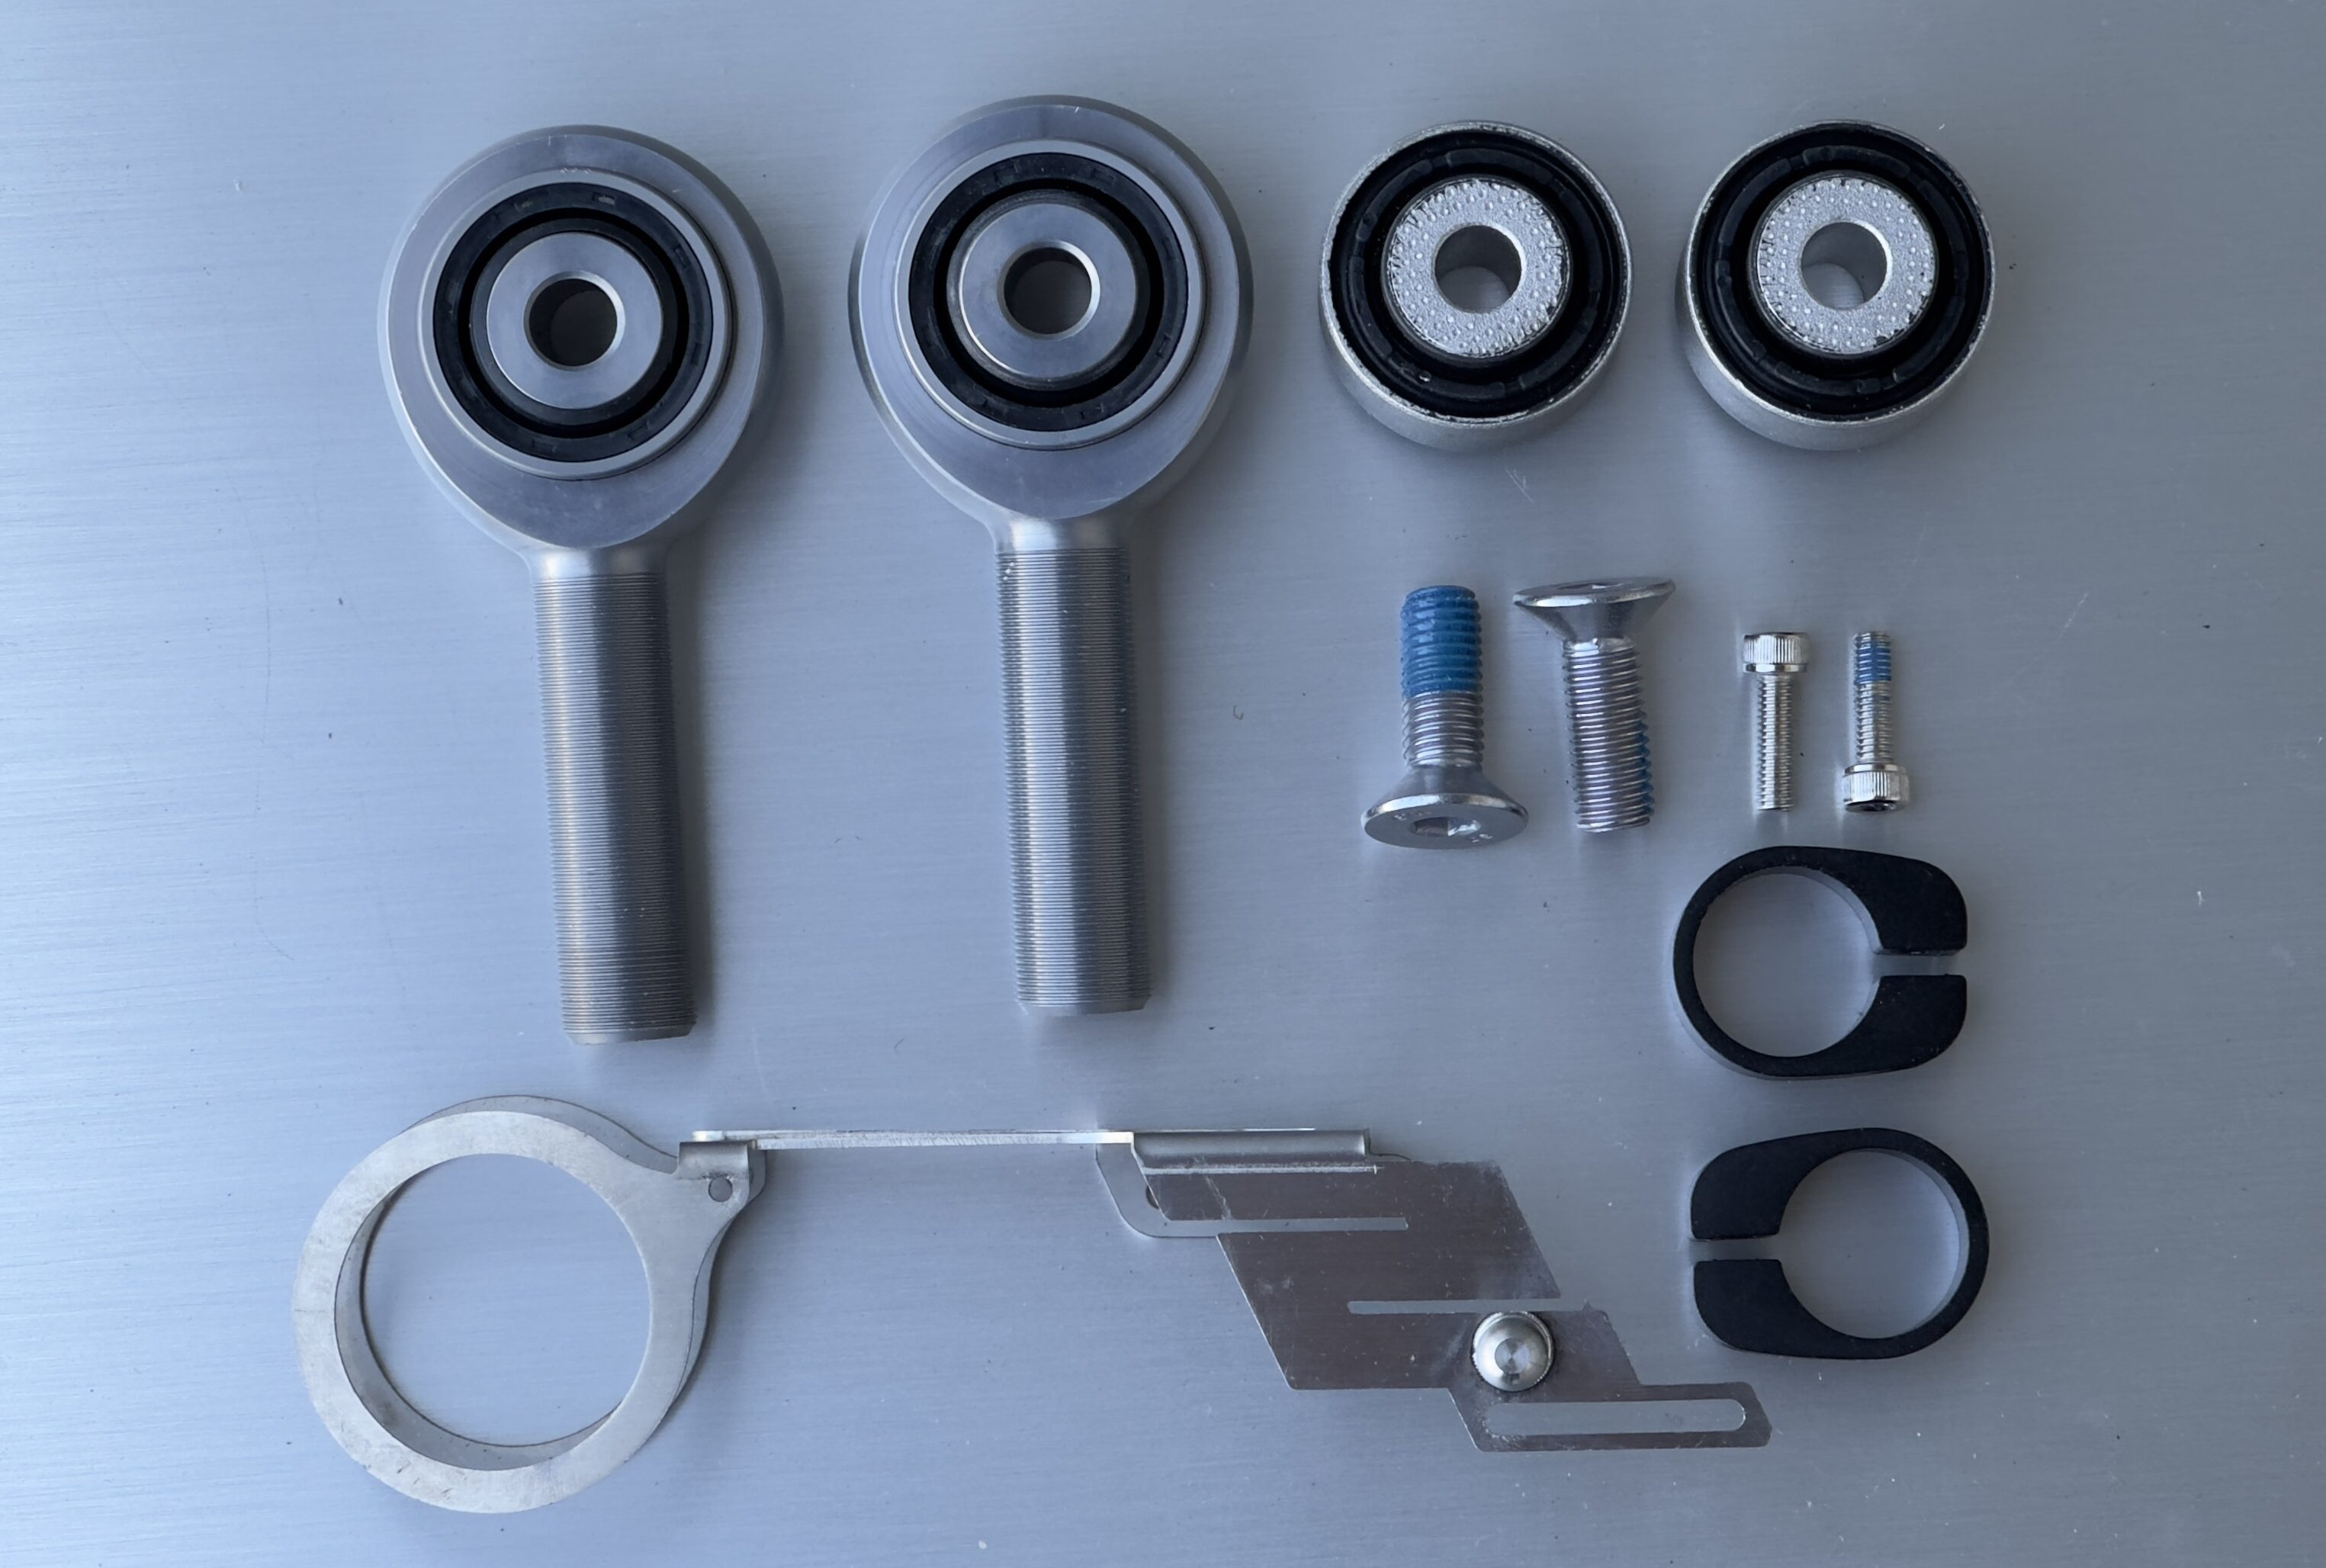
Dial in the perfect alignment for your Tesla Model S and X.  Our TSX-2 arms will allow you to add or remove rear toe and have approximately 5x greater range over factory adjustment, which has shown to be necessary for lowered or high mileage Teslas.   Our arms are a direct drop-in replacement for the original Tesla rear toe arms and come preset to the length of the factory arms. Each kit includes our class 10.9 bolts along with square spacer inserts to keep your car in alignment, as well as gaskets to seal out contaminants and corrosive debris.  Our products are made with the highest quality materials and craftsmanship for years of endurance and come with an unmatched 3-year to LIFETIME warranty.

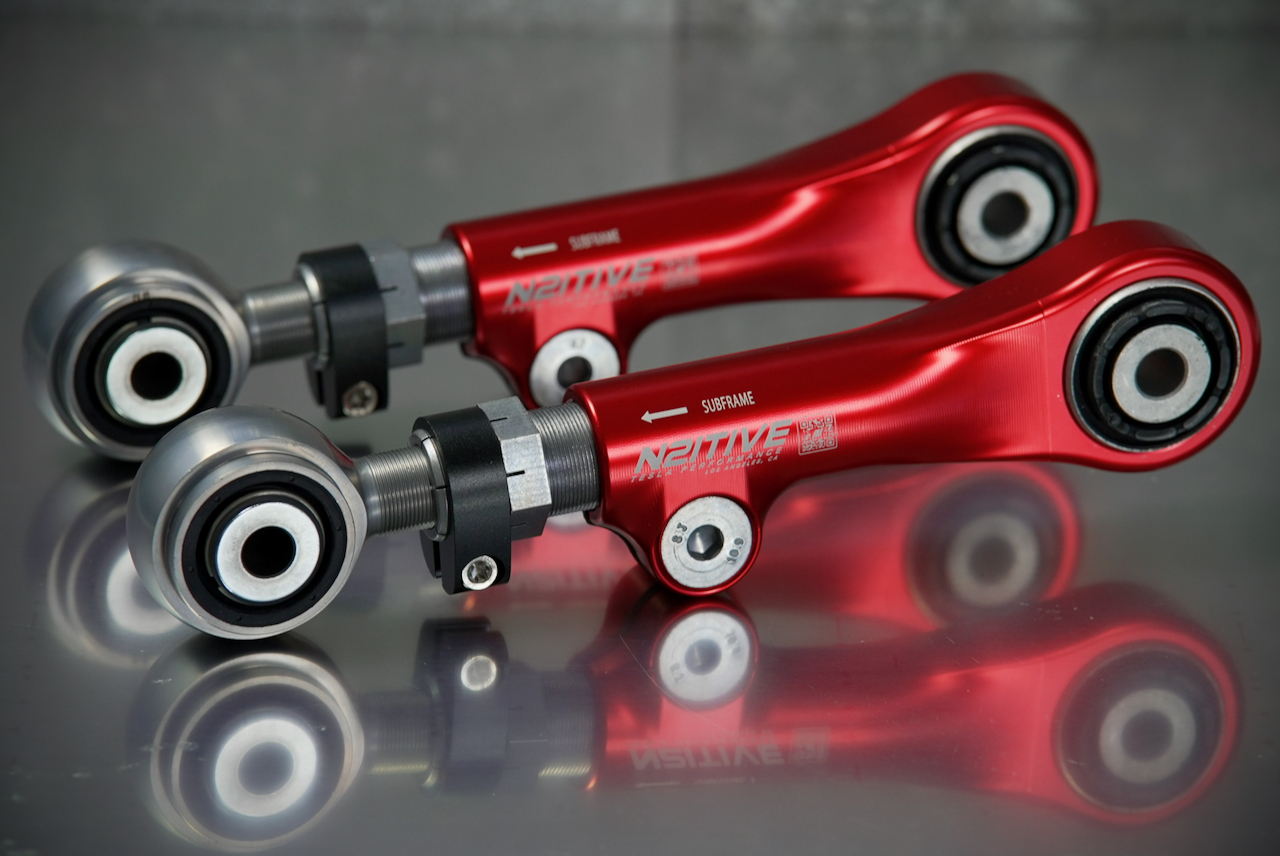
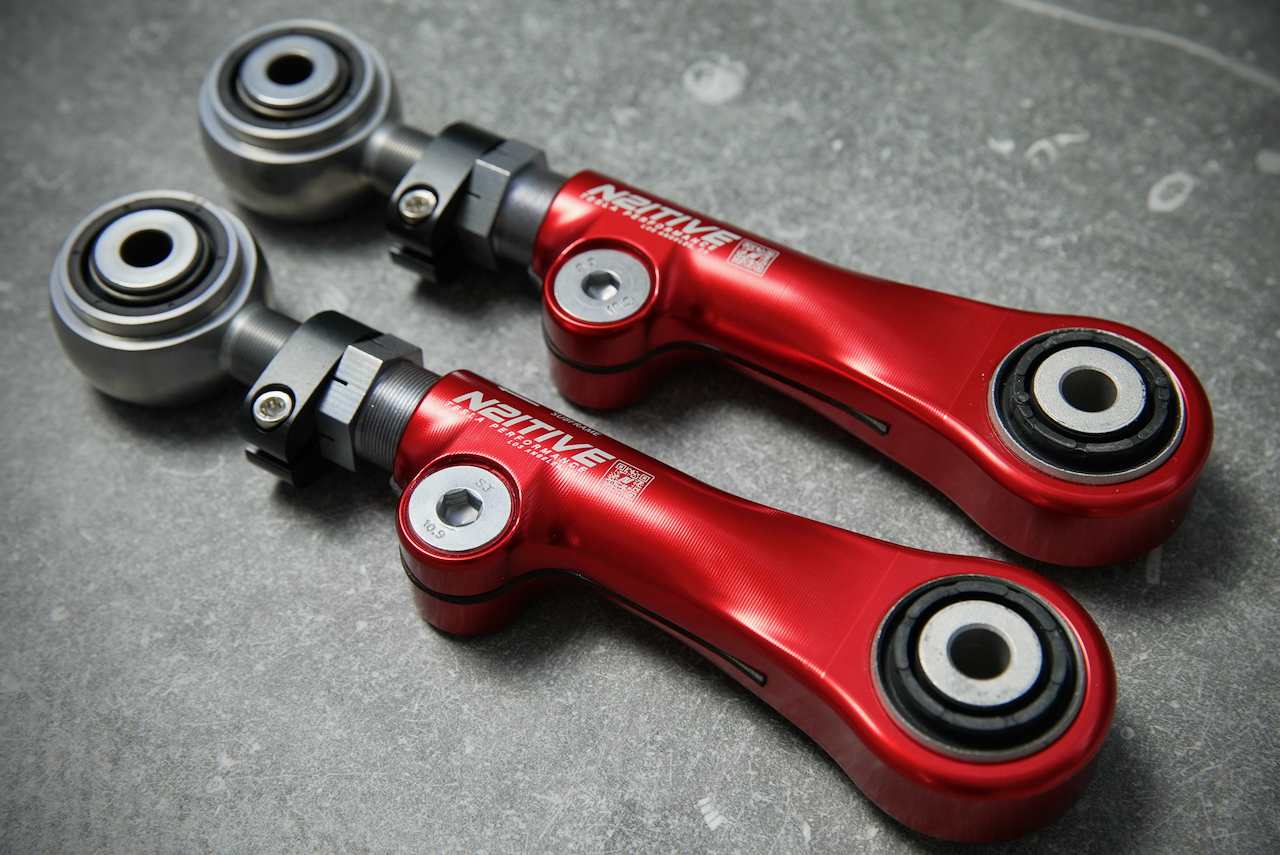
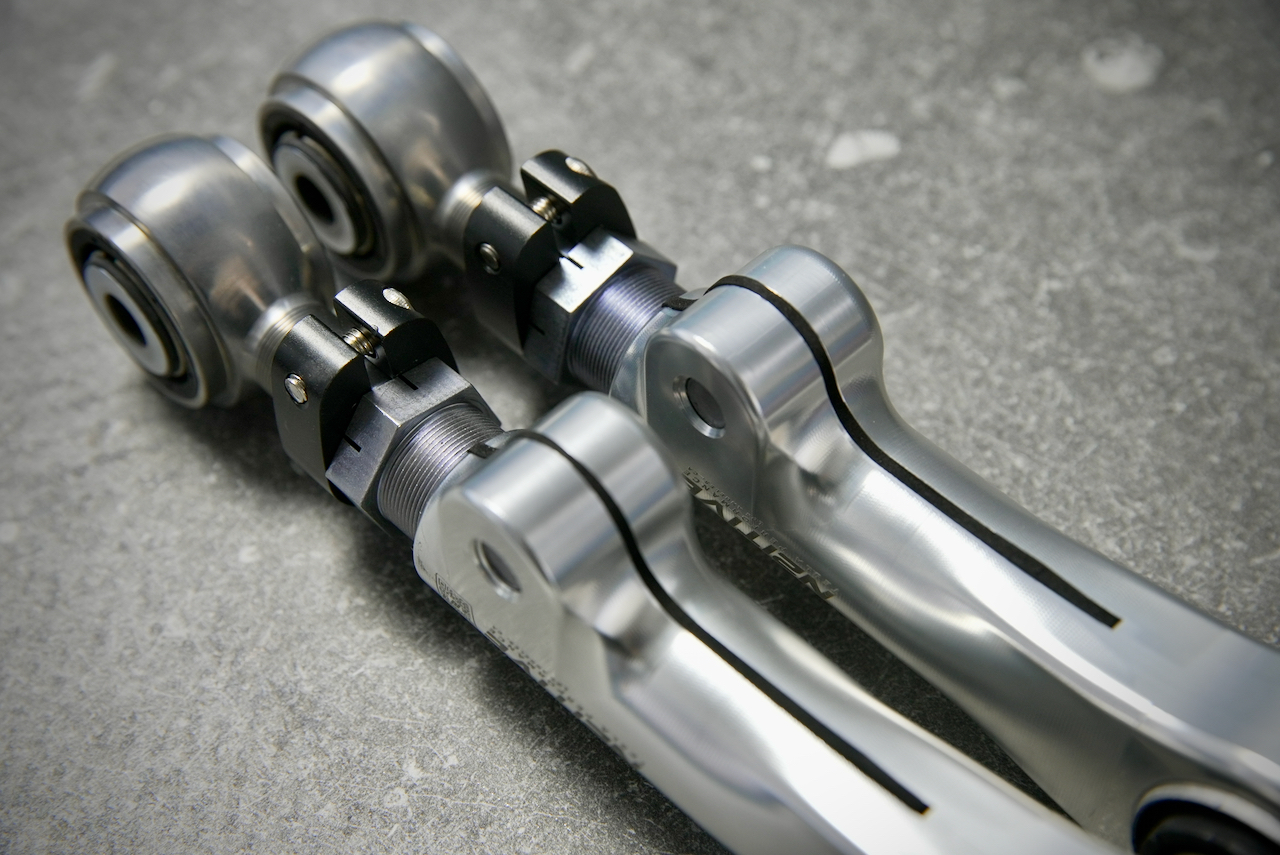
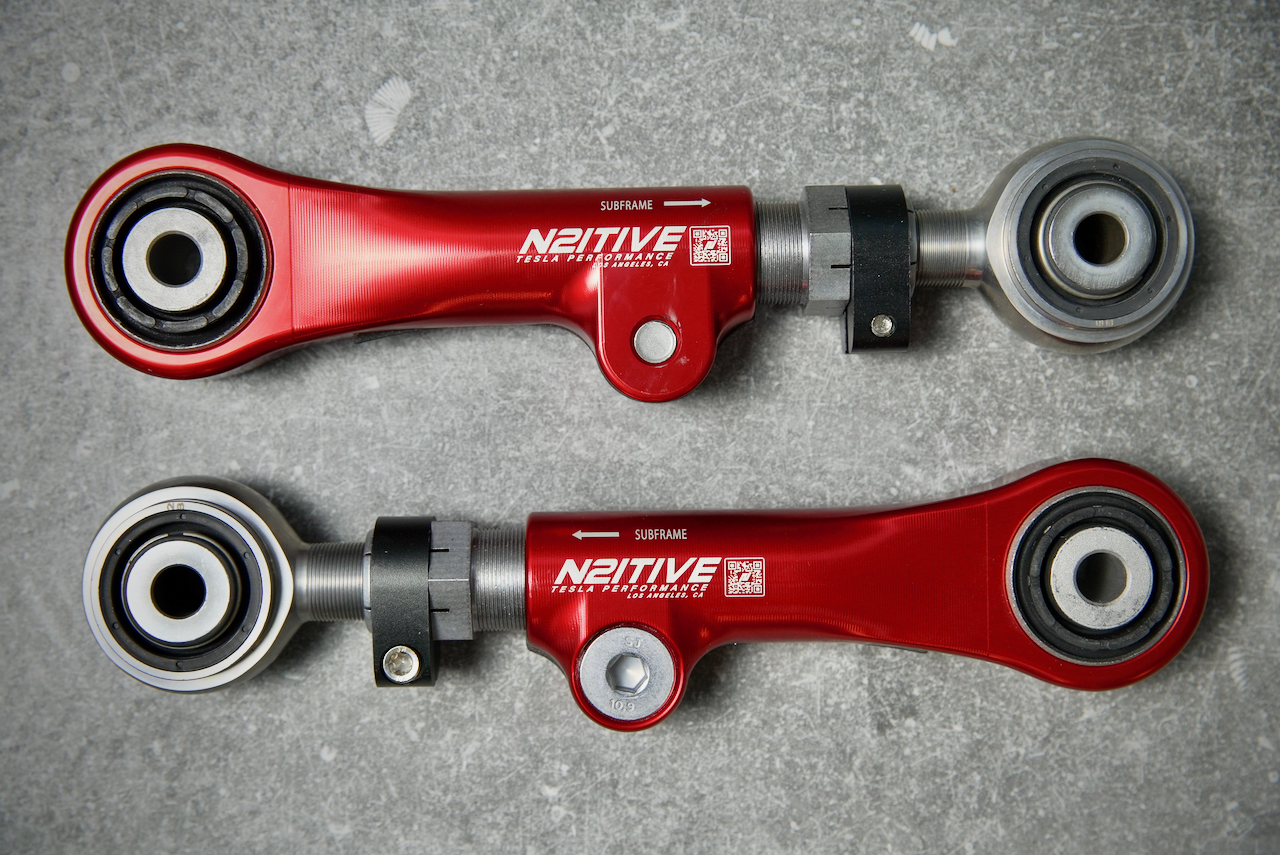
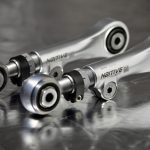
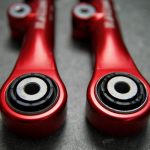
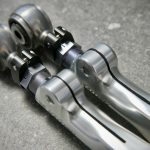
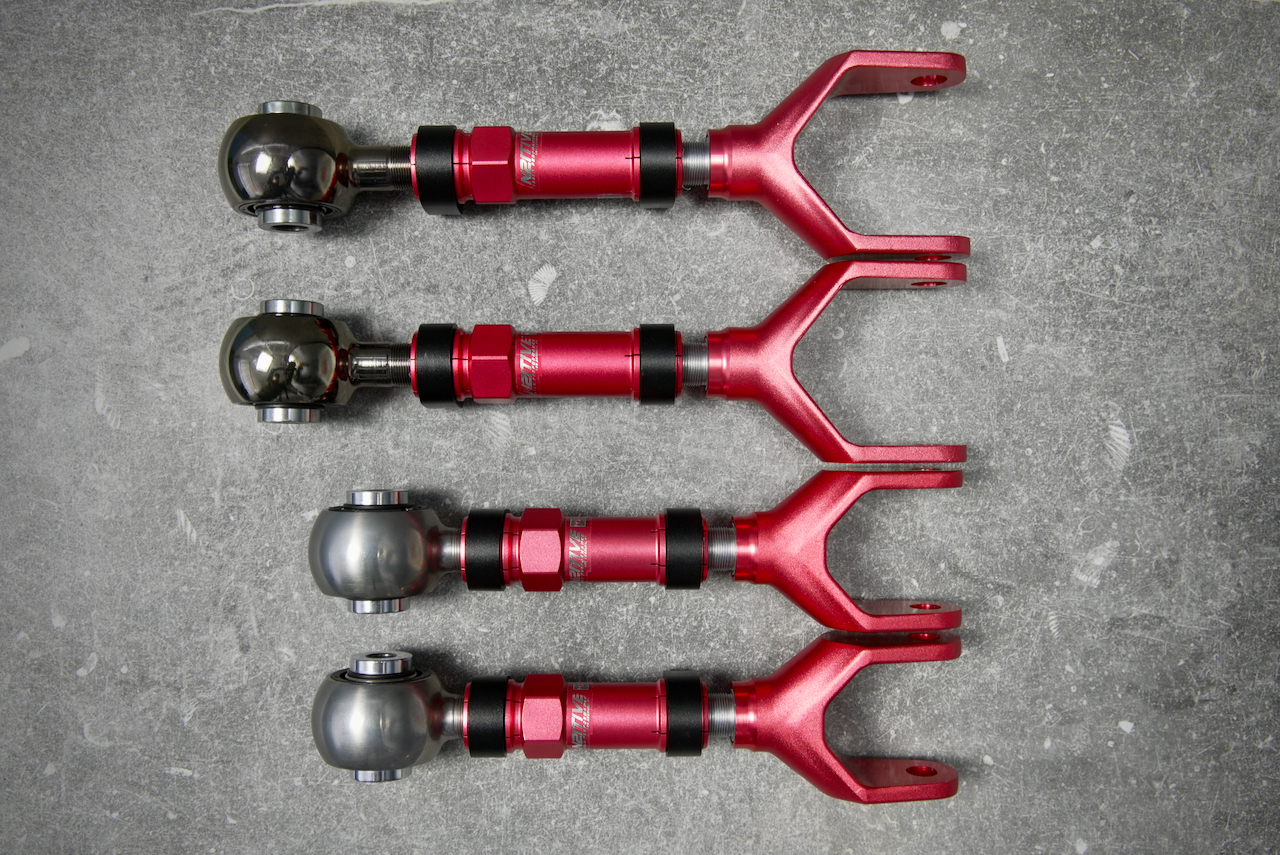
N2ITIVE’s TSX-2 rear adjustable toe arms (often called toe links) with both custom made spherical and annular bushings allow you to overcome the minimal +/-3.5mm of toe adjustment on the factory Tesla toe arms for the Model S and X.  The TSX-2 gives you up to 15mm of positive toe in and 15mm of negative toe out allowing you to dial in the perfect toe alignment in any circumstance.  The arms can work by themselves but were designed to be used tandem with N2ITIVE’s SX-2 adjustable camber arms, as enough camber/toe correction will inevitably move the other measurement out of spec.  Paired together, N2ITIVE’s SX-2 and TSX-2 adjustable arms give you plenty of adjustability to bring both your camber and toe into proper spec.

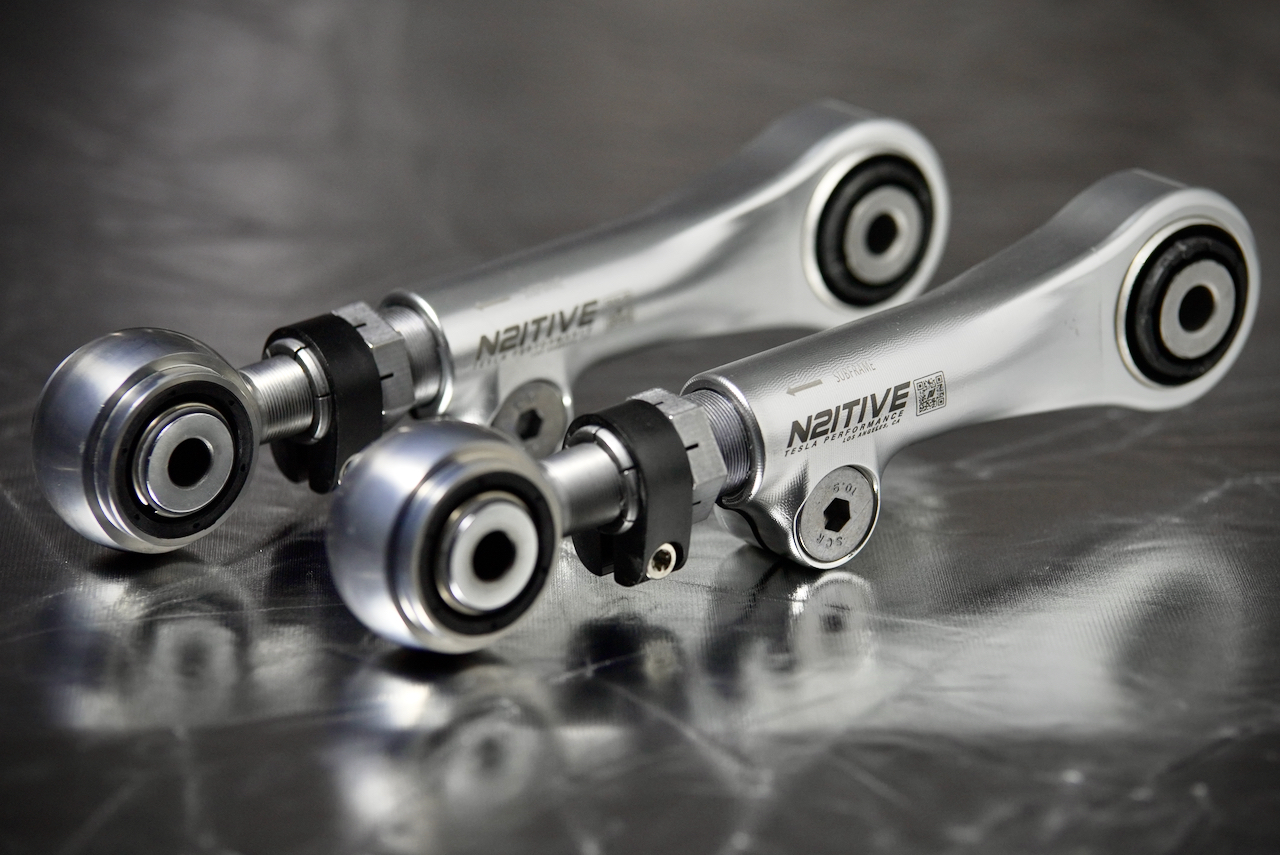
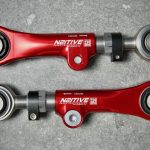
The TSX-2 rear toe arms come in three variations, all fabricated with automotive grade heat treated aluminum and anodized.  The Matte Red and Natural finishes will come with a 3-year warranty, while the Black version will come with a lifetime warranty.  Both versions have great corrosion resistance.  

Inner Tire Wear Damage Resulting In A Blowout On The Tesla Model S and X

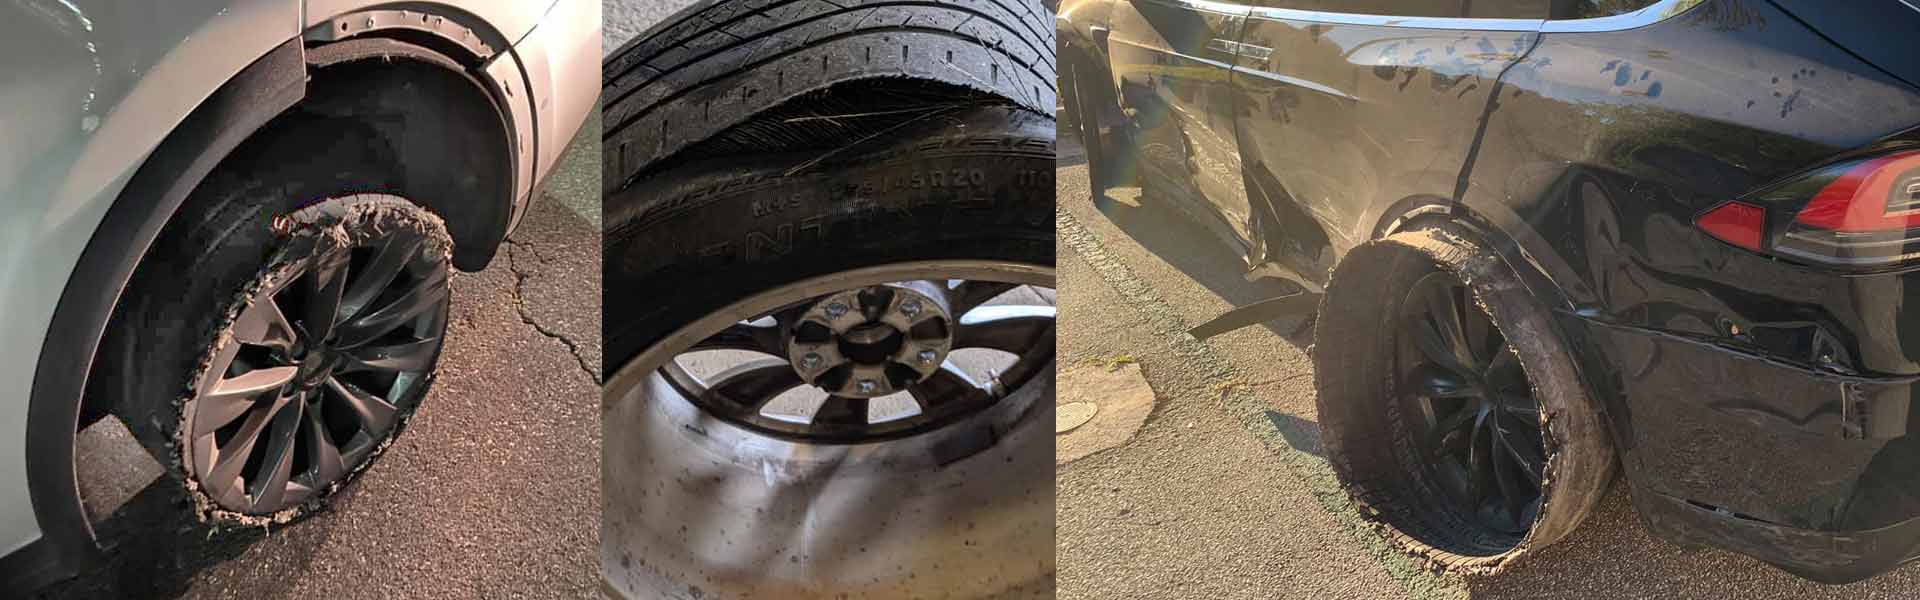
Stop inner tire wear before it causes a dangerous blowout, increase the longevity of your expensive tires.

Why Choose N2ITIVE

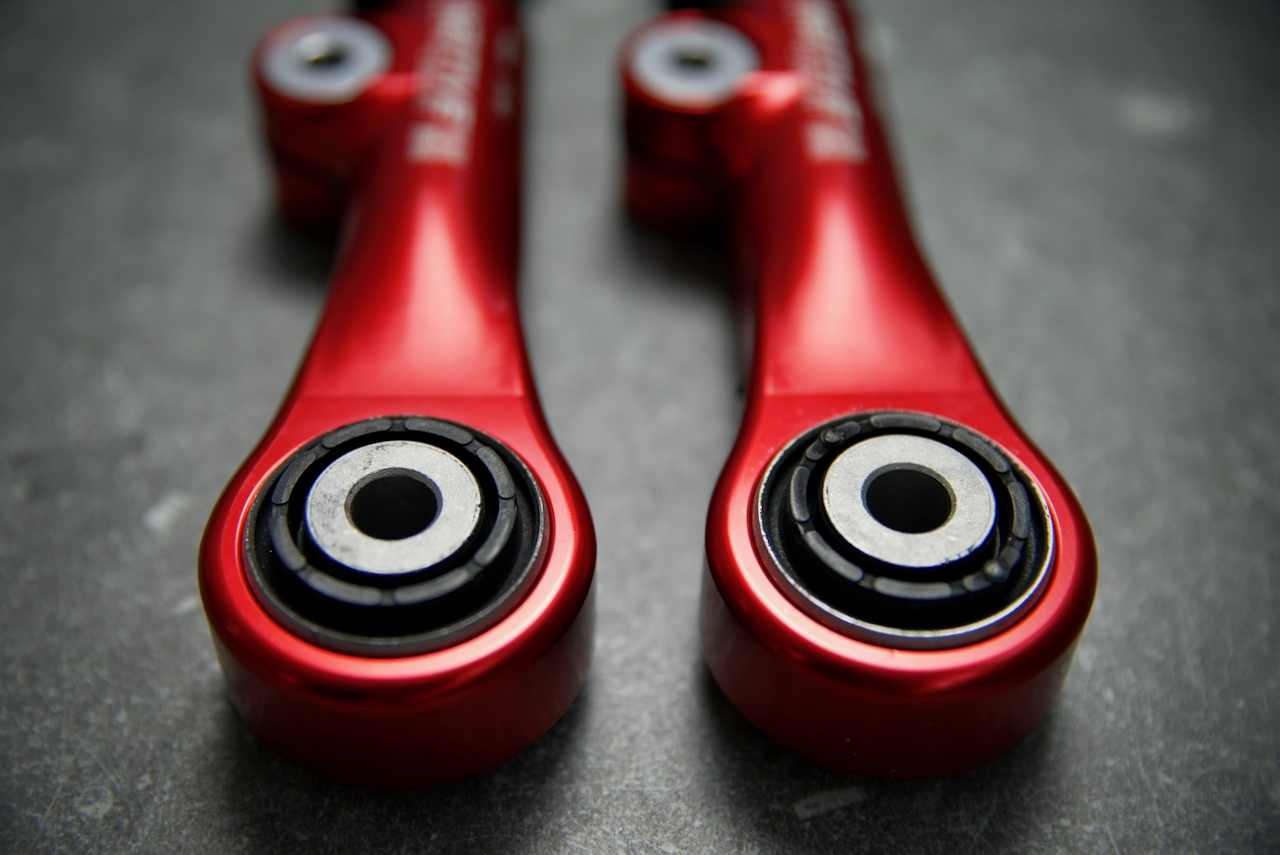
At N2ITIVE we give you the highest quality parts and craftsmanship at a reasonable price. Everything we create is meticulously thought-out, precision engineered and tested in both FEA and the real world!  All of our components are custom made, nothing off the shelf.  Our bushings for example are made in a dedicated factor with high strength steel that’s been electroless nickel plated for amazing wear and corrosion resistance.  Each bushing incorporates a Teflon infused Delrin liner for a lifetime of trouble-free, maintenance-free use.  You can count on us to only give you the best with our parts, backed with a hassle-free warranty to the original purchaser. Our products are the strongest, safest and most durable aftermarket Tesla parts you can buy, guaranteed!  Not to mention that they look incredible…

Installation

INSTALLATION INSTRUCTIONS: TSX-2

VIDEO INSTRUCTIONS CAN BE FOUND HERE
Estimated Labor:
1-2 hours
Parts and Tools Necessary:
-18mm, 19mm, 21mm wrenches and sockets
-T30 Torx bit
-8mm Allen key
-Torque Wrench
– Nylon Lock Nut (Part #2007063-00-B, Tesla recommendation)
*Electric saw (may not be necessary depending on model)

BEFORE INSTALL:
-If the vehicle is equipped with air suspension, activate “Jack Mode” through the touchscreen before lifting the vehicle. The air suspension will attempt to self-level otherwise, which may cause serious damage, bodily injury, or death.
-Make yourself familiar with the proper way to jack and lift your Tesla before attempting installation.

REMOVAL:
1. Jack the vehicle up from the appropriate lift areas, as shown below. Using lift pads between the jack and the vehicle’s frame is highly recommended in order to avoid damaging the vehicle.
2. Loosen the lug nuts (21mm) and remove the wheel.
3. Release the clip that holds the electronic parking brake harness to the toe arm.
4. Remove the bolt that connects the toe arm to the knuckle (18mm).
5. Remove the eccentric bolt that connects the toe arm to the subframe (18mm nut side, 19mm bolt side).
* Some models may not be able to remove the eccentric bolt on the subframe without dropping the subframe for clearance. If you are unable to remove the bolt by moving the toe arm upward with the washer removed, then proceed to the next step.
6. Rather than dropping the subframe, we recommend that you cut the end of the bolt instead. Use vise grips to prevent the bolt from rotating and carefully saw off the head on the other side. Use caution to not damage the adjacent brake line, and now you should be able to safely remove the arm from the vehicle.

INSTALLATION:
1. Verify that the arm being installed is correct, as the TSX-2 is mirrored for the driver and passenger sides. The TSX-2 should be around the same length of your stock arm, which can be verified by passing a bolt through both bushings. The rod-end bushing is to be installed on the subframe side, and the adjustment allen bolt should be facing towards the rear of the vehicle.
2. Fit the rod-end bushing between the subframe clevis first and begin reassembly using the provided hardware. The square washers, bolts, and nuts will replace the factory eccentric setup. Make sure that the bolt is inserted from the front of the vehicle, opposing the subframe and the original setup.
2. After fitting the toe arm back into the knuckle side, realign and hand-tighten the nuts and bolts in their original positions. DO NOT torque the nuts or bolts at this stage.
3. Preload the suspension before torquing down the bolts. This can be done by jacking the knuckle up until the suspension is fully loaded. The car itself should feel like it is about to lift and the hub should be positioned as if the car was sitting on the floor. This step is critical in ensuring the bushings are correctly positioned when you drive the car.
4. Once preloaded, torque the bolts down to their appropriate settings. The bolt towards the subframe should be torqued to 59 ft/lbs (80 Nm), and the knuckle side should be torqued to 96 ft/lbs (130 Nm).
5. Reattach the electronic parking brake harness to the side of the TSX-2 using the provided zip tie. Attaching the harness to the top may result in harness damage if the air shock bottoms out.
6. Remount the wheels back on the vehicle and torque down the lug nuts to 129 ft/lbs (175 Nm). Make sure to remove all jack stands and tools from under the vehicle before you let it down.

ADJUSTMENT:
-Adjustment of the TSX-2 is to be made using a 30mm or crescent wrench via the adjustor below the clamp.
-Loosen the T30 Torx bolt on the black collar as well as the 8mm allen bolt on the body of the arm. Both of these bolts must be loose for adjustment to be made.
-Tighten or rotate the adjuster clockwise in order to increase negative camber. Loosening or rotating the adjuster counter-clockwise will reduce negative camber.
-Once you are done adjusting, torque the 8mm and T30 bolts to spec. The 8mm allen should be tightened to 24 ft/lbs or 32.5 Nm, and the T30 Torx to 8 ft/lbs or 11 Nm. Make sure the collar with the T30 is aligned with the rod end to avoid damage while driving.

Reviews

Additional information
Your email address will not be published. Required fields are marked *
Add a review

Your email address will not be published. Required fields are marked *

6 reviews for TSX-2 Adjustable Toe Arms for Tesla Model S/X (2012- 01/2021)

5.0 Rating
1-4 of 4 reviews
  1. Review left

    (This review is originally from 2020)
    They finally came! Easy to install DIY at home, except for those toe bolts towards the battery. Sawzall is recommended. Too bad no one will see those beautiful arms!

    Unpacking of N2itive Alignment Kit 2
    Tesla X Worn Inner Rear Tires Before Installing N2itive Alignment Kit 2
    DIY Self Install of N2itive Alignment Kit 2 for Tesla S and X
    N2itive Alignment Kit 2 After Installation on Tesla Model X
    N2itive Alignment Camber Kit 2 after installation on Tesla Model X

    (1) (0)
  2. Review left

    I’m a mechanic and have extensive experience working on Teslas. Last year I installed EV Tuning’s adjustable camber and toe arms on my Model S, but they are garbage. After about year I noticed that the negative camber had become quite extreme and the ride quality was not right. I took my back wheels off to review the EV Tuning arms and noticed the bushings were completely torn and not holding in place. All four bushings were destroyed after only 8-10K miles.
    Fast forward I received my N2itive camber and toe arms and lowering links and I must say the craftsmanship is beyond incredible! Side by side there is no comparison. The quality is amazing. You get what you pay for and the customer support is great too. I’ve recommended N2itive parts to several Tesla owners!
    EV Turning camber arm bushing failure review
    EV Turning camber & toe arm bushing damage reviews
    EV Turning camber kit control arm bushing damage reviews

    (0) (0)
  3. Review left

    I found these adjustable control arms from a Tesla forum thread. I was searching to find a solution for the inner rear tire wear on my Model S. They come preset to the factory length so I was able to install them myself and then take it to Tesla to have them align it. The service technician at my local service center was really impressed with the quality and was able to dial in a perfect alignment. I had about -2.5 degrees of camber in the rear with the old arms and while that is within Tesla’s spec for this car, the inner tire wear was horrible. Now I’m at -0.8 degrees of camber which is also within Tesla’s alignment spec. I also got the adjustable toe arms since the factory adjustment on the rear toe is so minimal. Also let me just add that customer service is outstanding! They were always ready to answer my questions before purchasing to make sure I knew exactly what I needed. Very helpful and professional. I’m happy with my purchase.

    Now that I have N2itive adjustable camber and toe arms installed and aligned I can confirm that their quality is not only looks amazing, but performs great too. My alignment has remained stable and my inner tire wear has been eliminated. Also the acceleration shudder is no longer an issue. My only complaint is that shipping took a long time since they were out of stock when I ordered.

    n2itive tsx-1 adjustable control arm toe links
    n2itive tsx-1 control arm spherical bushing

    (1) (0)
  4. Review left

    UPDATE June-26-2022: Almost 2 years after installing the N2itive Kit. I have attached photos of my rear tires. They have about 10k miles on them. The last set lasted about 45k.
    Perfectly even inner tire wear on a Tesla Model X with N2itive Camber Kit

    These are the ultimate compliment to the camber arms. The camber arms help out tremendously with the factory excessive camber, but these allow you to tweak the toe settings a little bit more to get the ultimate tire settings. Make sure you buy these in conjunction with the camber arms.

    (4) (0)