SKU: SX-2
Categories:

SX-2 Adjustable Camber Arms for Tesla Model S/X (2012- 01/2021)

FREE HATS to all orders above $100! ? Add any hat to your cart. At checkout, enter
coupon code:  HAT4FREE  for a 100% OFF the hat!
Matte Natural Anodized - 3-Year Warranty
$644.00
Matte Natural Anodized - 3-Year Warranty
Matte Red Anodized - 3-Year Warranty
$644.00
Matte Red Anodized - 3-Year Warranty
Matte Black Anodized - Multi-Alignment Kit + LIFETIME WARRANTY
$844.00
Matte Black Anodized - Multi-Alignment Kit + LIFETIME WARRANTY
minus
1
plus
? Add any hat to your cart. At checkout, enter
coupon code:  HAT4FREE  for a 100% OFF the hat!
FREE HATS to all orders above $100!
The N2ITIVE SX-2 adjustable rear camber arms are designed to address the common inner tire wear issues that plague the Tesla Model S and X.  These arms are available in the Red and Natural Anodized finishes with a 3-Year Warranty or the Black Anodized finish with Lifetime Warranty and work best when used in conjunction with our TSX-2 Toe Arms.

More information about the product

Description

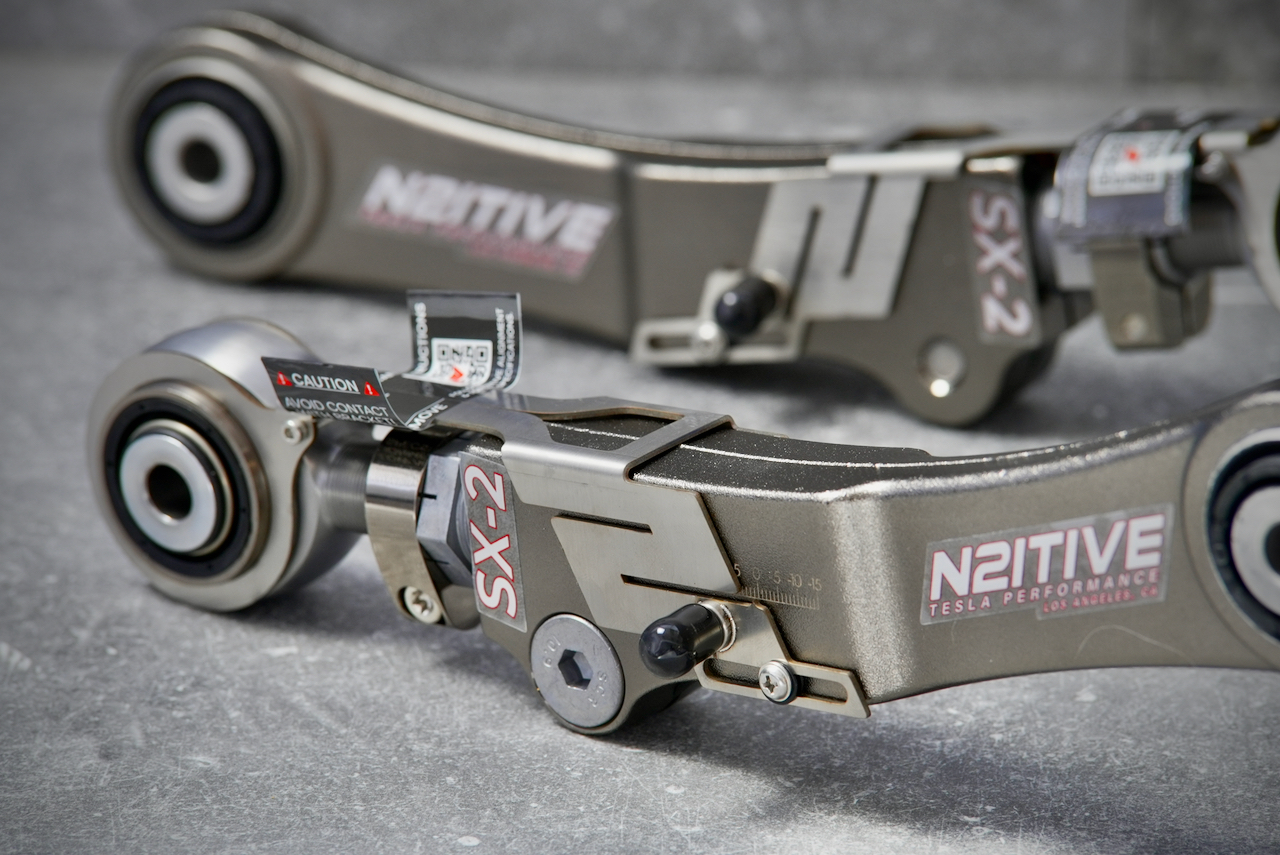
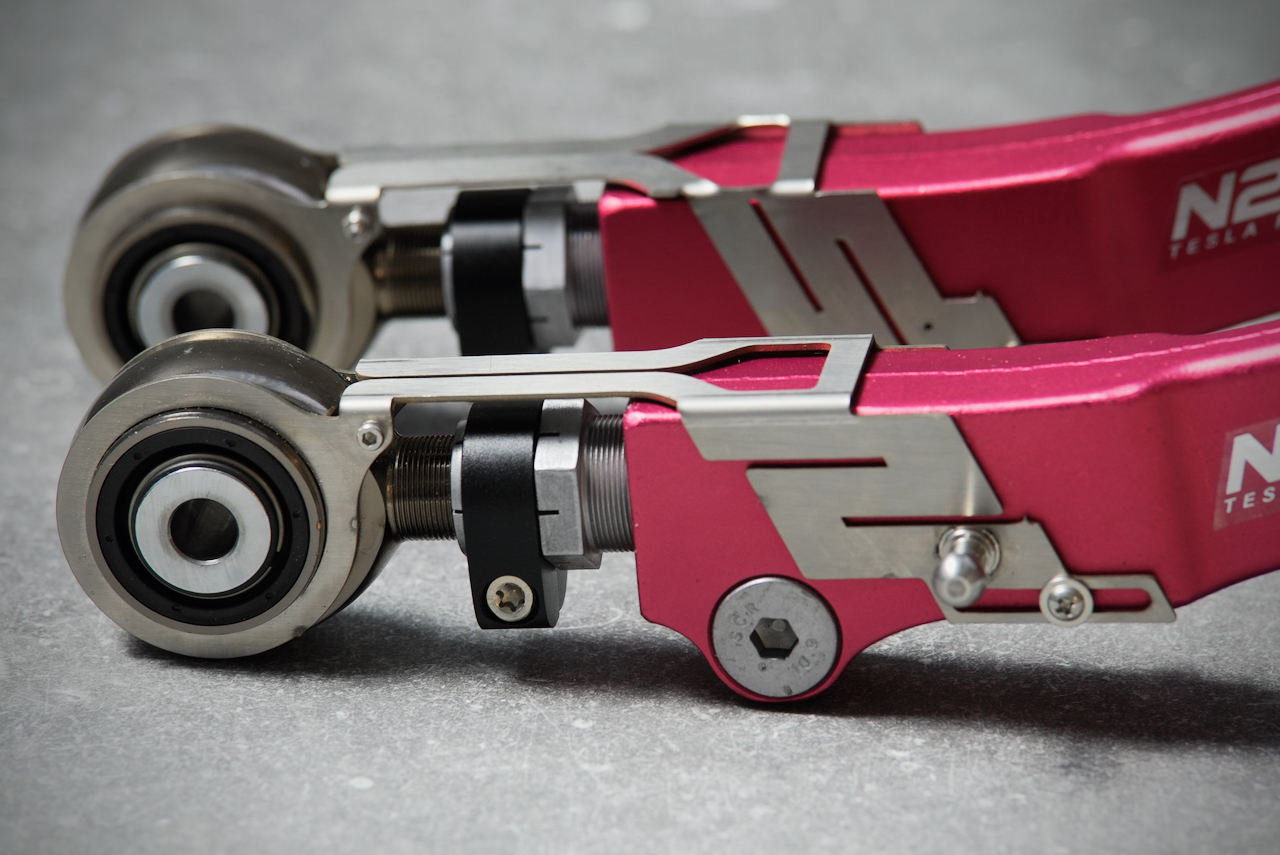
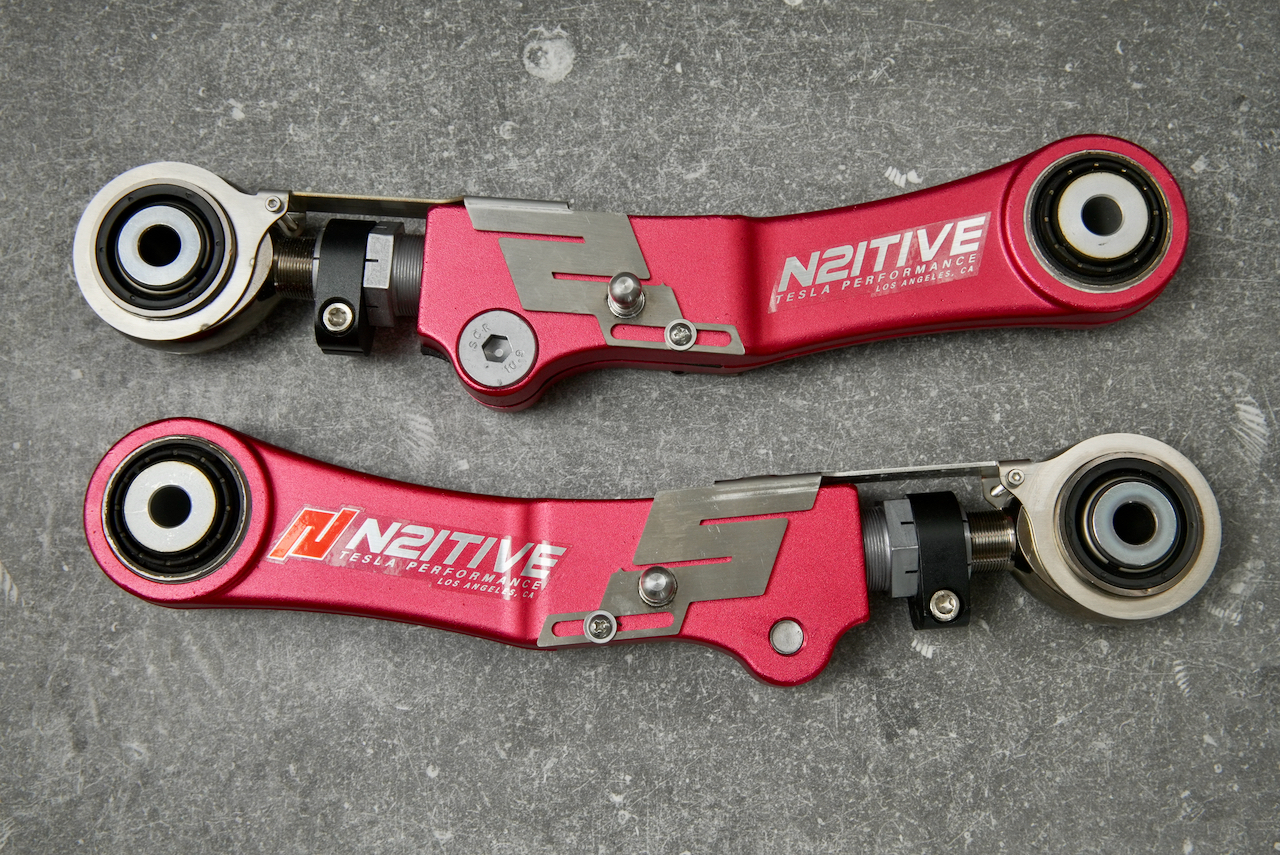
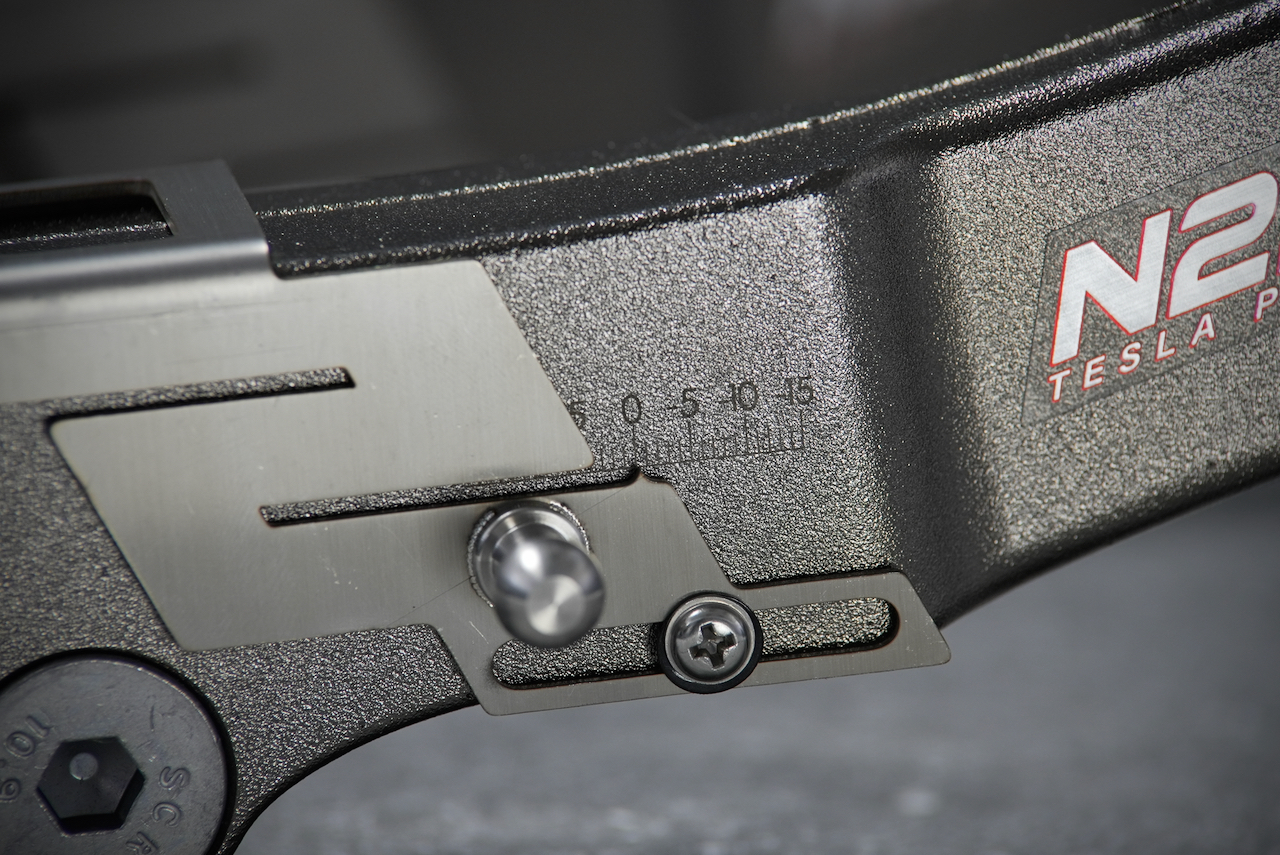
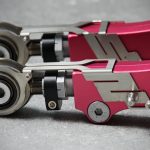
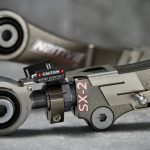
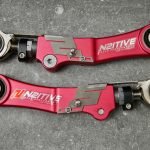
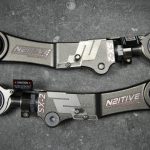
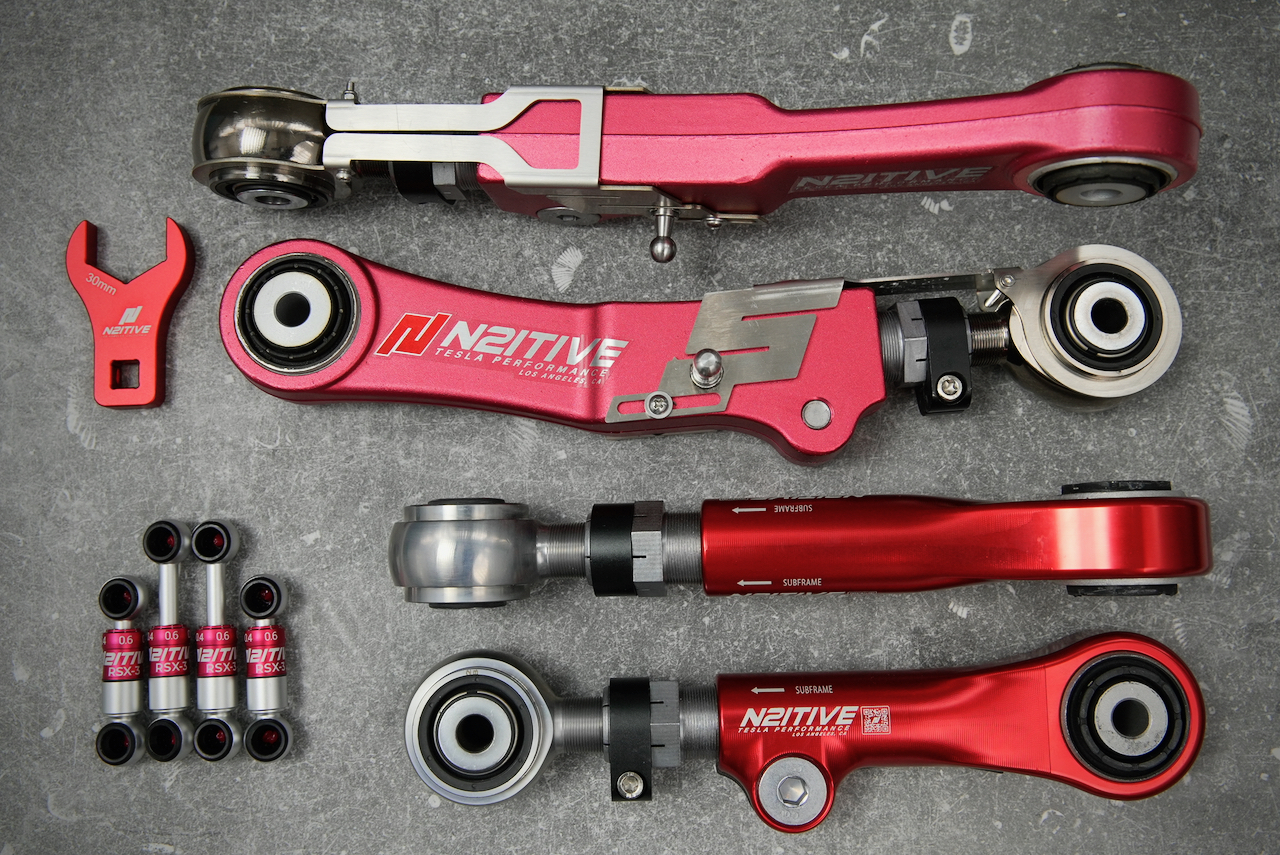
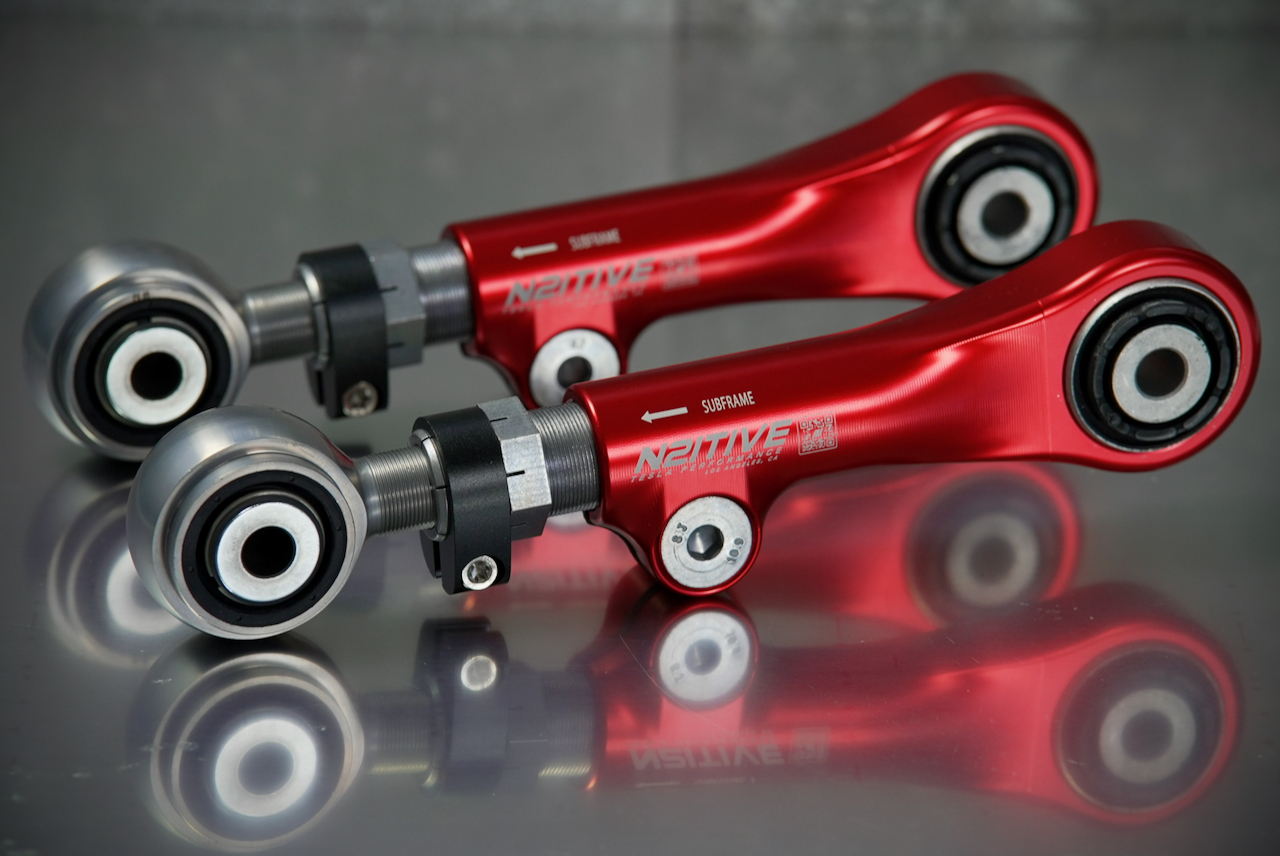
N2ITIVE is proud to say our new SX-2 adjustable rear camber arms have been redesigned from the ground up.  This latest, fully forged revision offers big changes including our new patent pending ride height compensation kit on all versions as well as our custom made spherical and annular bushings!  This setup allowed us to change the position of the adjuster to the subframe side, accommodating much easier access when aligning the car.  The kit will automatically compensate for the change in arm length at all times to maintain a stable ride height position under any circumstance.  The Black version also comes with our new patent pending multi-alignment recall scale, allowing the user to preset multiple alignments and then recall them without the need to revisit an alignment shop.  These are both firsts in the automotive world and quite helpful for those who like to race their cars on the weekends.  With our multi-alignment kit installed, you can set alignment for the track, drag strip, and the street at any time.

We recommend using the SX-2 in combination with our TSX-2 adjustable toe arms as in our Alignment Kit 1 or 2 (full camber kit).  Adding adjustable rear toe arms becomes all the more necessary if you’re planning to install these on a lowered or high mileage/older Tesla, as the more camber adjustment is needed, the more toe you will be adding.  The factory 3.5mm adjustment range simply is not enough for many of the Model S/Xs.

Our arms will pay for themselves over the span of a few tires, as our customers usually multiply their tire life by 2-5x after proper installation and alignment.  The arms are direct drop-ins for the factory counterparts, meaning they can be installed with ease by an alignment shop or even at home for those who are mechanically inclined.  Our installation instructions and videos will also guide you through the process, and we’re always here to help get your Tesla aligned right and driving safe.

Inner Tire Wear Damage Resulting In A Blowout On The Tesla Model S and X

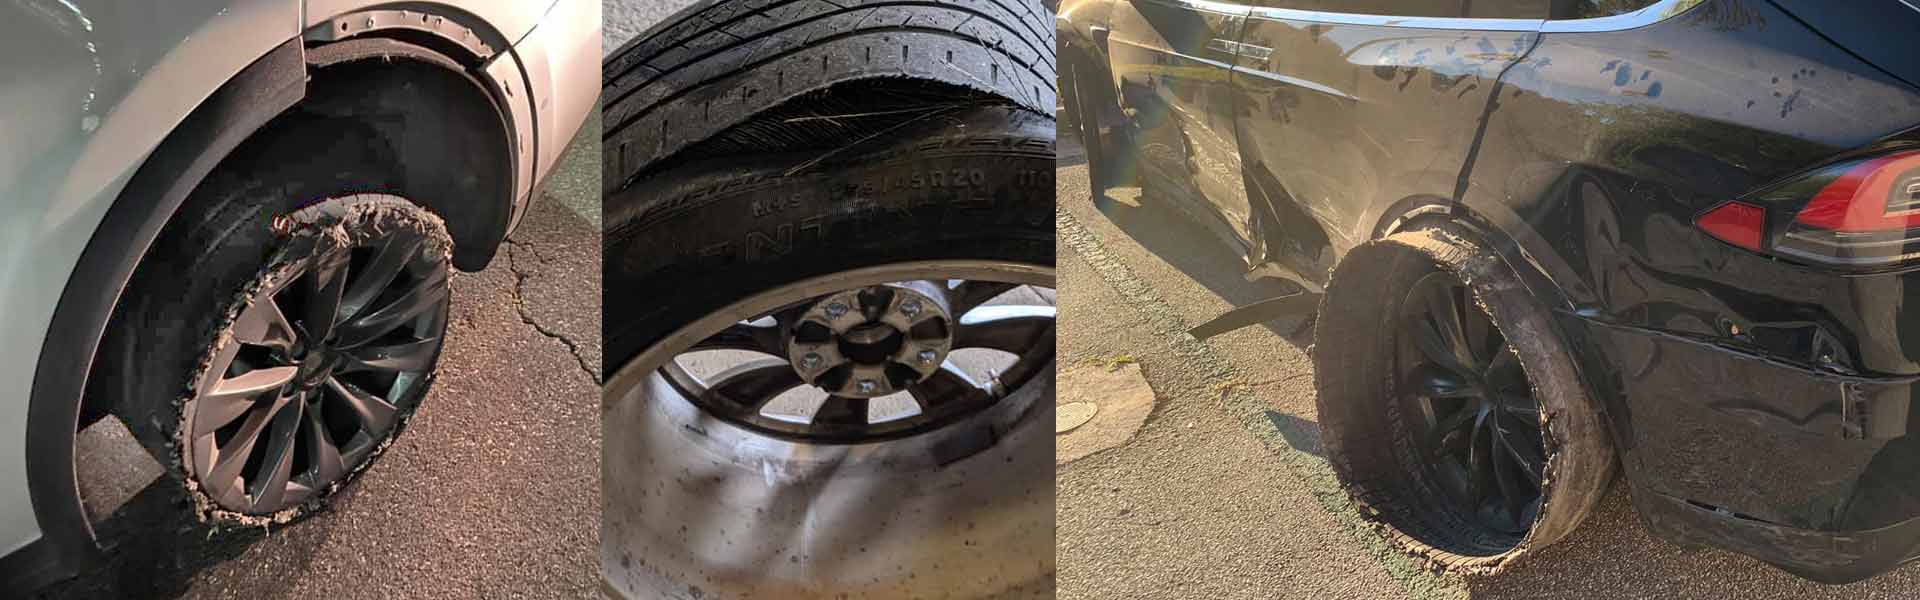
Stop inner tire wear before it causes a dangerous blowout, increase the longevity of your expensive tires.

Why Choose N2ITIVE
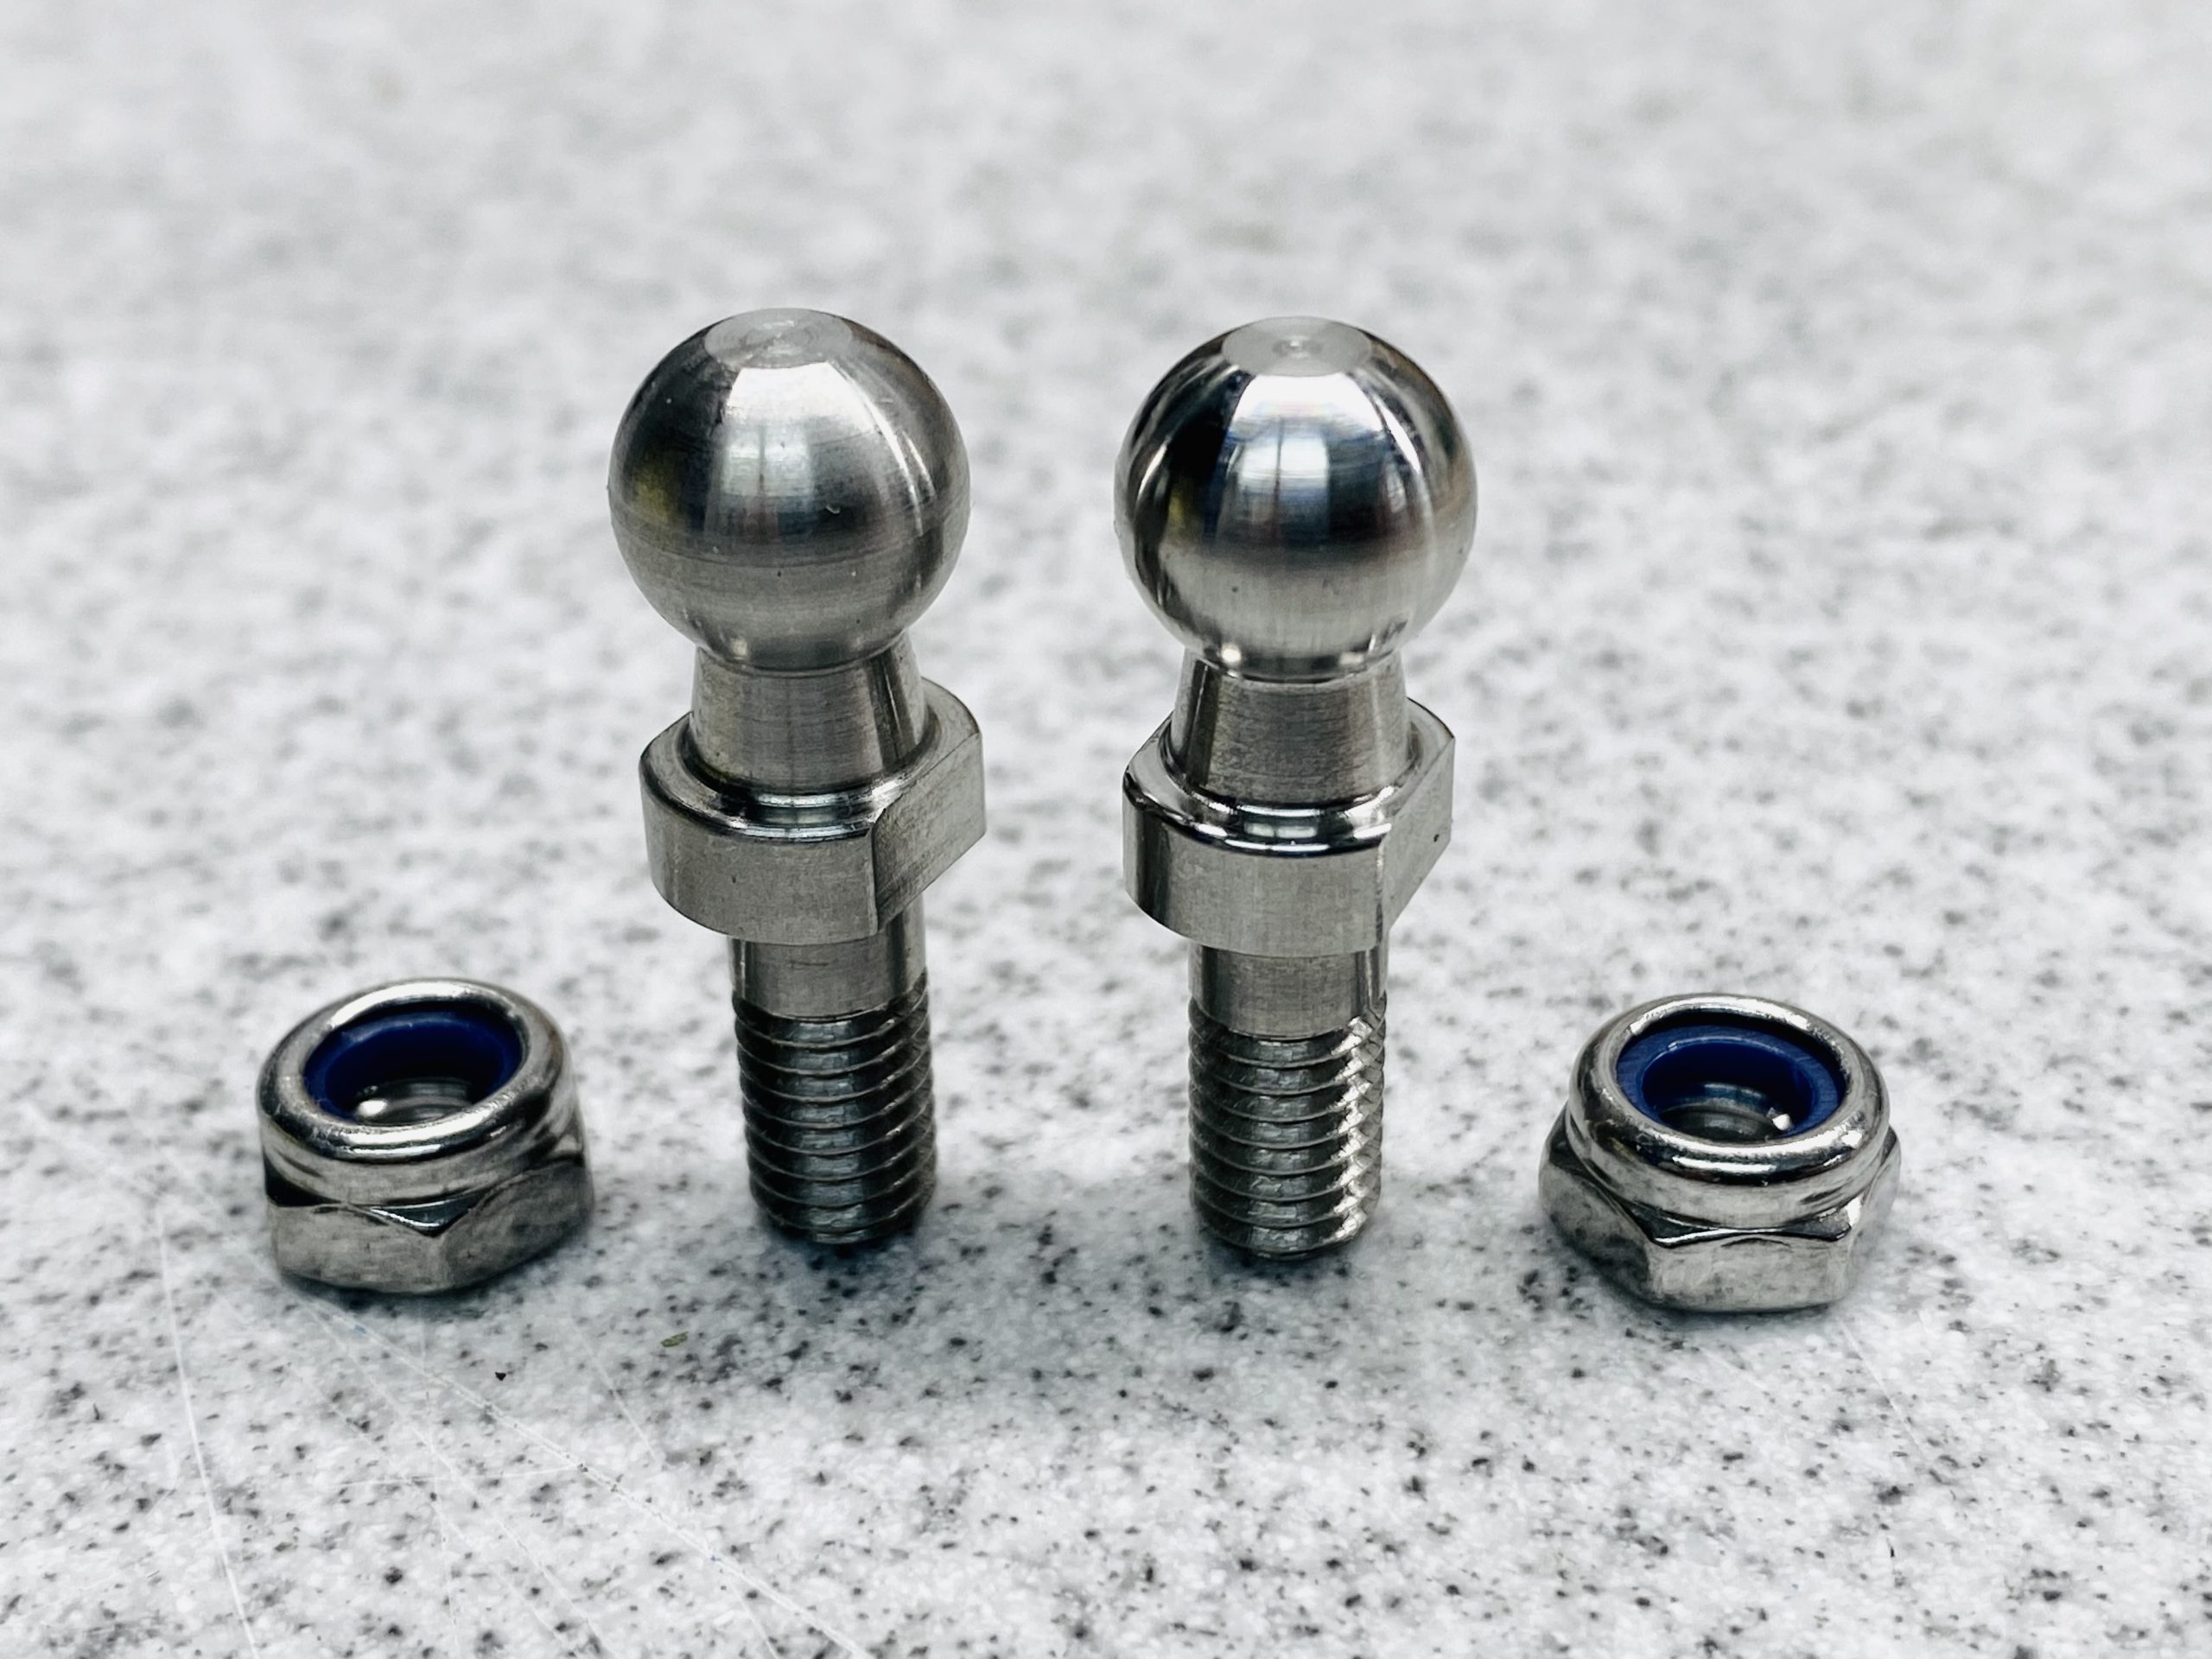
At N2ITIVE we give you the highest quality parts and craftsmanship at a reasonable price. Everything we create is meticulously thought-out, precision engineered and tested in both FEA and the real world!  All of our components are custom made, nothing off the shelf.  Our bushings for example are made in a dedicated factor with high strength steel that’s been electroless nickel plated for amazing wear and corrosion resistance.  Each bushing incorporates a Teflon infused Delrin liner for a lifetime of trouble-free, maintenance-free use.  You can count on us to only give you the best with our parts, backed with a hassle-free warranty to the original purchaser. Our products are the strongest, safest and most durable aftermarket Tesla parts you can buy, guaranteed!  Not to mention that they look incredible…

Installation

INSTALLATION INSTRUCTIONS: SX-2

VIDEO INSTRUCTIONS CAN BE FOUND HERE
Estimated Labor:
1-2 hours
Parts and Tools Necessary:
-15mm, 18mm, 21mm wrenches and sockets
-T30 Torx bit
-8mm Allen key
-Screwdriver or other small prying device
-Torque Wrench
-Nylon lock nut (Part #2007076, Tesla recommendation)

BEFORE INSTALL:
-If the vehicle is equipped with air suspension, activate “Jack Mode” through the touchscreen before lifting the vehicle. The air suspension will attempt to self-level otherwise, which may cause serious damage, bodily injury, or death.
-Make yourself familiar with the proper way to jack and lift your Tesla before attempting installation.

REMOVAL:
1. Jack the vehicle up from the appropriate lift areas, as shown below. Using lift pads between the jack and the vehicle’s frame is highly recommended in order to avoid damaging the vehicle.
2. Loosen the lug nuts (21mm) and remove the wheel.
* Take note of the position that the sensor link sits at. The link must be re-installed in the same position, as the vehicle may not read the ride height correctly otherwise.
3. Pry off the short sensor link from the ball attached to the original camber arm. This can be done with a large flat head screwdriver or small pry bar, gently using the original camber arm as a fulcrum point. Always exercise caution when dealing with the links, as they have many points of failure.
4. Remove the bolt that connects the camber arm to the knuckle (15mm).
5. Remove the nut and bolt that connect the camber arm to the subframe (18mm).
6. Remove the camber arm from the vehicle. If you are having trouble removing the camber arms, rocking the knuckle/hub may aid in loosening and removing the arm.

INSTALLATION:
1. Verify that the arm being installed is correct, as the SX-2 is mirrored for the driver and passenger sides. The SX-2 should be around the same length of your stock arm, which can be verified by passing a bolt through both bushings. The rod-end bushing is to be installed on the subframe side, and the ball stud for the sensor link should be facing forward.
2. Realign and hand-tighten the nuts and bolts in their original positions. DO NOT torque the nuts or bolts at this stage. Note that aligning the hub side first will result in an easier install.
3. Preload the suspension before torquing down the bolts. This can be done by jacking the knuckle up until the suspension is fully loaded. The car itself should feel like it is about to lift and the hub should be positioned as if the car was sitting on the floor. This step is critical in ensuring the bushings are correctly positioned when you drive the car.
4. Once preloaded, torque the bolts down to their appropriate settings. The bolt towards the subframe should be torqued to 96 ft/lbs (130Nm), and the knuckle side to 103 ft/lbs (140Nm).
5. If installing back original links, apply a small amount of white lithium or other appropriate automotive grease in the socket. Carefully press the link back onto the camber arm. N2itive RSX-3 links come pre-greased so there would be no need to apply extra grease if installing them.
6. Remount the wheels back on the vehicle and torque down the lug nuts to 129 ft/lbs (175 Nm). Make sure to remove all jack stands and tools from under the vehicle before you let it down.

ADJUSTMENT:
-Adjustment of the SX-2 is to be made using the 30mm wrench provided along with the arms. Other wrenches will likely be too large and damage the bracket, which may result in an inaccurate reading on the engraved scale.
-Loosen the T30 Torx bolt on the black collar as well as the 8mm allen bolt on the body of the arm. Both of these bolts must be loose for adjustment to be made.
-Tighten or rotate the adjuster clockwise in order to increase negative camber. Loosening or rotating the adjuster counter-clockwise will reduce negative camber.
-Once you are done adjusting, torque the 8mm and T30 bolts to spec. The 8mm allen should be tightened to 24 ft/lbs or 32.5 Nm, and the T30 Torx to 8 ft/lbs or 11 Nm. Make sure the collar with the T30 is aligned with the rod end to avoid damage while driving.

Reviews

Additional information
Your email address will not be published. Required fields are marked *
Add a review

Your email address will not be published. Required fields are marked *

7 reviews for SX-2 Adjustable Camber Arms for Tesla Model S/X (2012- 01/2021)

5.0 Rating
1-5 of 7 reviews
  1. Review left

    I’m a retired Tool & Die Maker. I’m impressed by the quality of the Camber and Toe arms. I installed the arms myself without issue. I had several questions, which Don answered in detail. I called him on a Saturday, and he spent time explaining things to me. I marked and measured everything for reference. Both the product and support after the sale are superior.

    (0) (0)
  2. Review left

    (This review is originally from 2020)
    They finally came! Easy to install DIY at home, except for those toe bolts towards the battery. Sawzall is recommended. Too bad no one will see those beautiful arms!

    Unpacking of N2itive Alignment Kit 2
    Tesla X Worn Inner Rear Tires Before Installing N2itive Alignment Kit 2
    DIY Self Install of N2itive Alignment Kit 2 for Tesla S and X
    N2itive Alignment Kit 2 After Installation on Tesla Model X
    N2itive Alignment Camber Kit 2 after installation on Tesla Model X

    (1) (0)
  3. Review left

    I’m a mechanic and have extensive experience working on Teslas. Last year I installed EV Tuning’s adjustable camber and toe arms on my Model S, but they are garbage. After about year I noticed that the negative camber had become quite extreme and the ride quality was not right. I took my back wheels off to review the EV Tuning arms and noticed the bushings were completely torn and not holding in place. All four bushings were destroyed after only 8-10K miles.
    Fast forward I received my N2itive camber and toe arms and lowering links and I must say the craftsmanship is beyond incredible! Side by side there is no comparison. The quality is amazing. You get what you pay for and the customer support is great too. I’ve recommended N2itive parts to several Tesla owners!
    EV Turning camber arm bushing failure review
    EV Turning camber & toe arm bushing damage reviews
    EV Turning camber kit control arm bushing damage reviews

    (0) (0)
  4. Review left

    We specialized in Tesla repairs and modifications and always recommend N2itive products to our customers. The build quality is far superior than anything I have seen in today’s market. Don takes pride in his product and you can see it in his product and packaging. I also have N2itive products on our show car here at Evfixme. Thank you Don!

    (1) (0)
  5. Review left

    I purchased the camber and toe arm set and had them installed recently on my Tesla Model S. I was sick and tired of running through expensive tires due to inner tire wear. I have my car lowered pretty low so lucky for me there was an affordable solution.

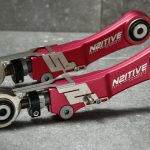
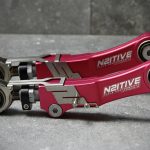
    I saw them on display at EVFixme and thought they were so beautifully crafted and built solid. The anodized red metal was calling for me.

    After installation and alignment I was shocked at how dialed in the car was. It was so smooth!

    I recommend any of the products made by N2itive. The craftsmanship of the product and customer support is 2nd to none.

    Jason

    San Diego,CA

    N2itive Alignment Kit 2 Installed
    N2itive Adjustable Toe control arms
    N2itive vs OEM Tesla camber control arms
    N2itive perfect alignment after installing sx-1 and tsx-1 adjustable tesla control arms

    (1) (0)